How to Google Translate with JavaScript
 JavaScript
 Language translation can be time-consuming and expensive, especially for sites containing a lot of content that requires translations in multiple languages. And, if you're not fluent in those languages, the translations can come out entirely incorrect.
Luckily, Google has provided a simple solution for websites that need to easily deliver content in multiple languages. Enter Google Translate, a free multilingual translation service built for JavaScript and providing support in over 100 different languages.
The implementation is simple and doesn't require you to download any external libraries or dependencies to work on your website. Let's dive right in so you can get going!
Invoking the Google Translate Library
First, we need to create an element to house the Google Translate drop-down. This drop-down will allow your users to select any language they would like to translate your page content to:
<div id="google_translate_element"></div>
Next, we need to create a reference to the Google Translate API:
<script src="//translate.google.com/translate_a/element.js?cb=googleTranslateElementInit"></script>
And finally, we need to create our default function call googleTranslateElementInit() defined in our script tag above, to invoke the Google Translate API in its simplest form:
function googleTranslateElementInit() {
	new google.translate.TranslateElement(
		{
			pageLanguage: "en"
		},
		"google_translate_element"
	);
}
The Three Different Button Layouts
There are three different button layouts available for the Google Translate API:
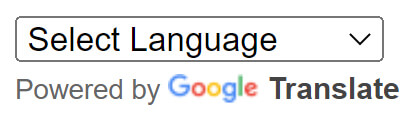
- Vertical Layout: Displays the language selection drop-down above the "Powered by Google Translate" text. This is the default layout, so omitting the
layoutreference inTranslateElement()will provide the same result.
function googleTranslateElementInit() {
	new google.translate.TranslateElement(
		{
			pageLanguage: "en",
			layout: google.translate.TranslateElement.InlineLayout.VERTICAL
		},
		"google_translate_element"
	);
}- Horizontal Layout: Displays the language selection drop-down alongside the "Powered by Google Translate" text.

function googleTranslateElementInit() {
	new google.translate.TranslateElement(
		{
			pageLanguage: "en",
			layout: google.translate.TranslateElement.InlineLayout.HORIZONTAL
		},
		"google_translate_element"
	);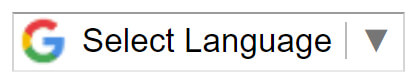
}- Simple Layout: Omits the "Powered by Google Translate" text entirely, leaving on the language selection drop-down.
function googleTranslateElementInit() {
	new google.translate.TranslateElement(
		{
			pageLanguage: "en",
			layout: google.translate.TranslateElement.InlineLayout.SIMPLE
		},
		"google_translate_element"
	);
}
Translating Only Specific Pieces of Content
If there are sections or pieces of content that you do not want to translate, then you can bypass translation by wrapping that text in an element with class name notranslate:
<!-- This content will be translated -->
<p>Translate this content.</p>

<!-- This content will not be translated -->
<p class="notranslate">Do not translate this content.</p>
Conclusion
This was a simple walkthrough of the Google Translate API. It's effective, supports many different languages, and is free to use. You can either use it to translate your content in real-time, or even use it to translate different pieces of content that you can then save and server any way you need.
Written by: J. Rowe, Web Designer & Developer
Last Updated: June 02, 2022Created: January 09, 2022