Divi for WordPress: Install An Amazing Theme Builder
Divi is one of the most popular and powerful themes for WordPress. Created by Elegant Themes, Divi is more than just a theme — it's a complete design framework that allows you to easily create beautiful websites. Whether you're a novice or a seasoned designer, Divi offers a robust set of tools to transform your web design vision into reality.
Why Choose Divi?
Divi comes packed with tons of features, standing out in the crowded field of WordPress themes for several reasons:
- Drag-and-Drop Builder: Divi's visual builder is a game-changer. You can drag and drop elements, make real-time edits, and see your changes instantly.
- Customizable and Flexible: With Divi, you have complete control over your site's design. Customize everything from fonts and colors to layouts and animations.
- Responsive Design: Your site will look amazing on any device, as Divi ensures that all your designs are fully responsive.
- Pre-made Layouts: Not a design wizard? No problem! Divi offers hundreds of pre-made layouts to jumpstart your project.
How to Install Divi
Ready to dive into Divi? Here's a step-by-step guide to get you started.
Step 1: Purchase and Download
Head over to the Elegant Themes website and sign up for a membership. This gives you access to Divi, along with other themes and plugins.
Please note that this is an affiliate link for Elegant Themes. I may receive compensation for purchases made through this link at no additional cost to you!
Click the Unlock the Power of Divi button, then click the Join Today button to view pricing.
Step 2: Choose a Plan
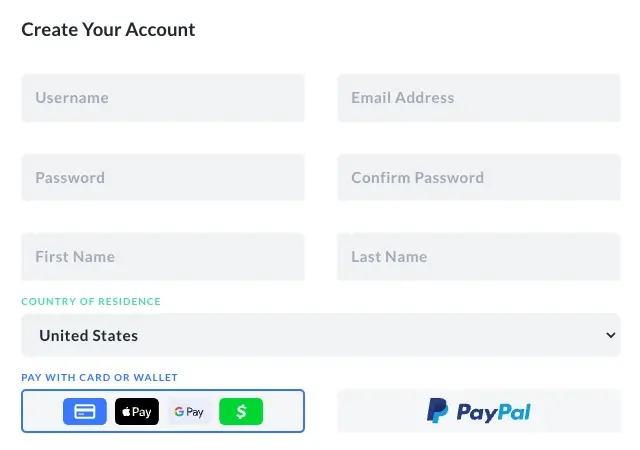
You can select an annual or lifetime license, where you pay once per year or a one-time fee and own the license forever! Whichever plan you choose, you'll be able to use the Divi theme on as many websites as you'd like with no limitations. Enter some information and payment details, and you'll be ready to rock!
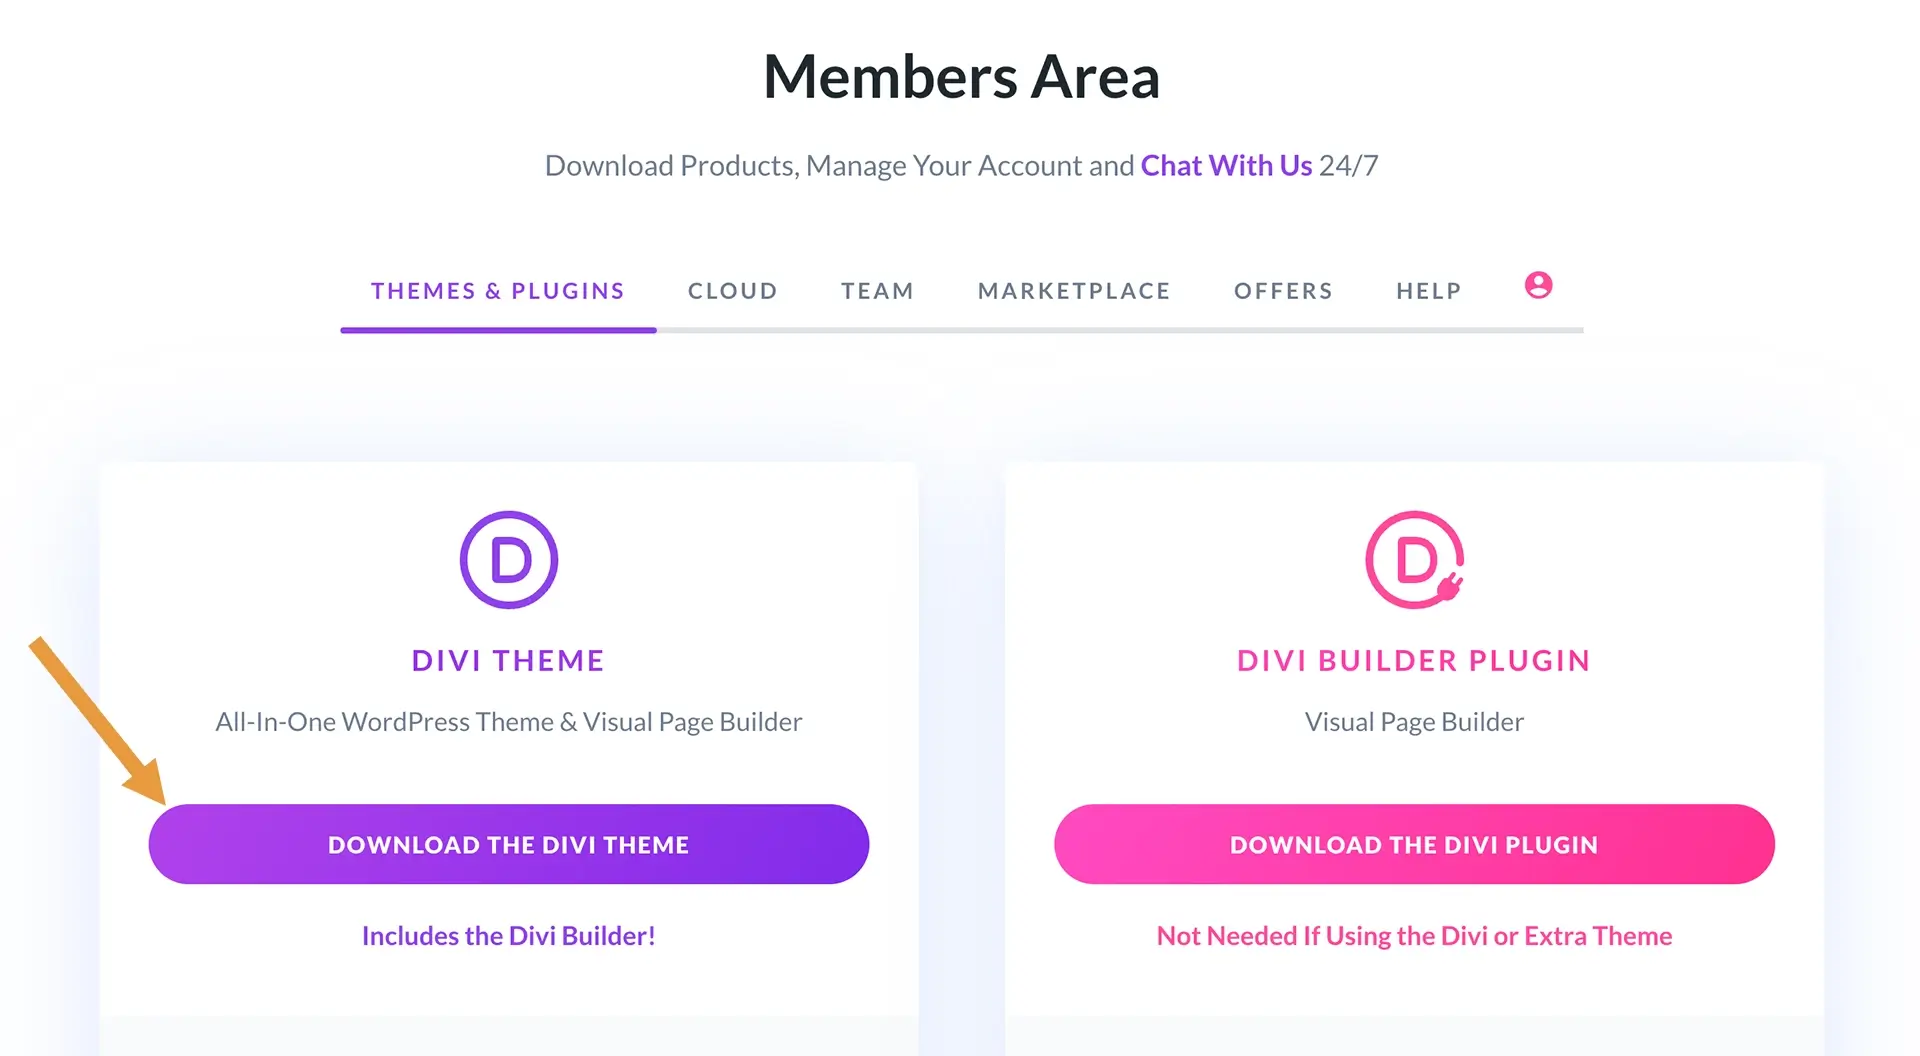
Now that you've purchased your new Divi theme license, you can download the theme from your Elegant Themes account portal.
Step 3: Install Divi
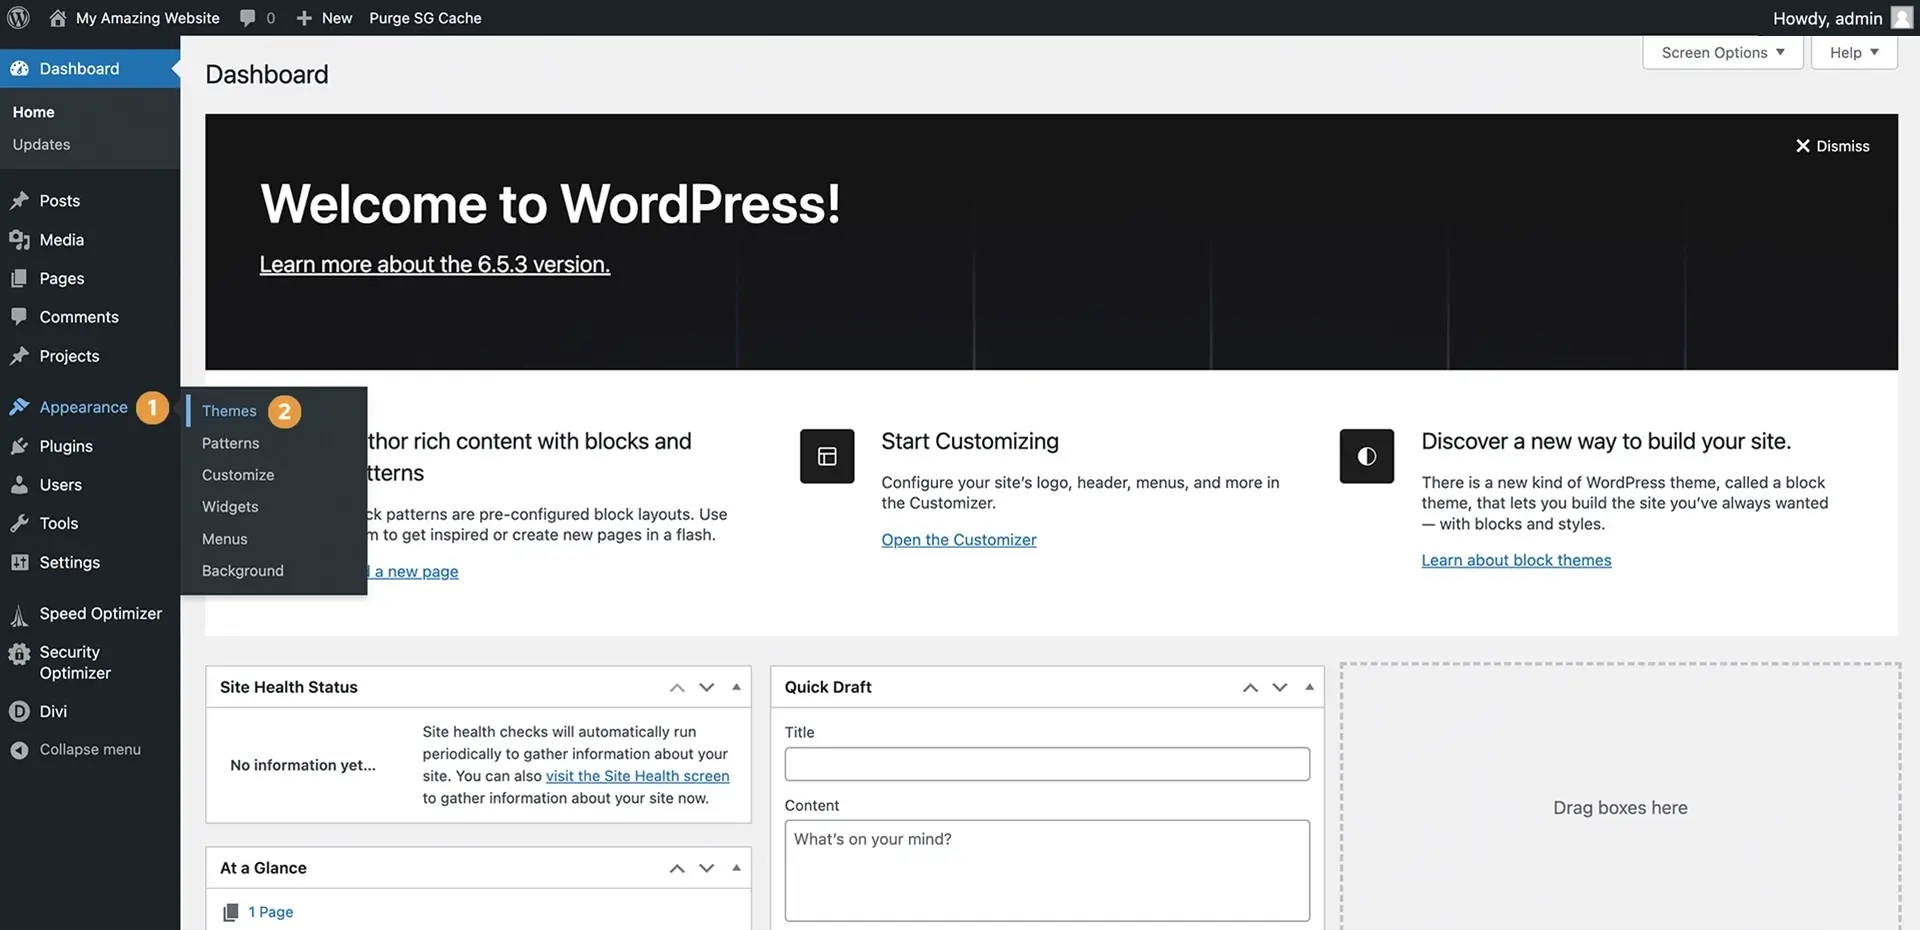
Open your website's WordPress dashboard. You can access this at your domain's WP-Admin directory, e.g., example.com/wp-admin
Now, navigate to Appearance > Themes in the sidebar.
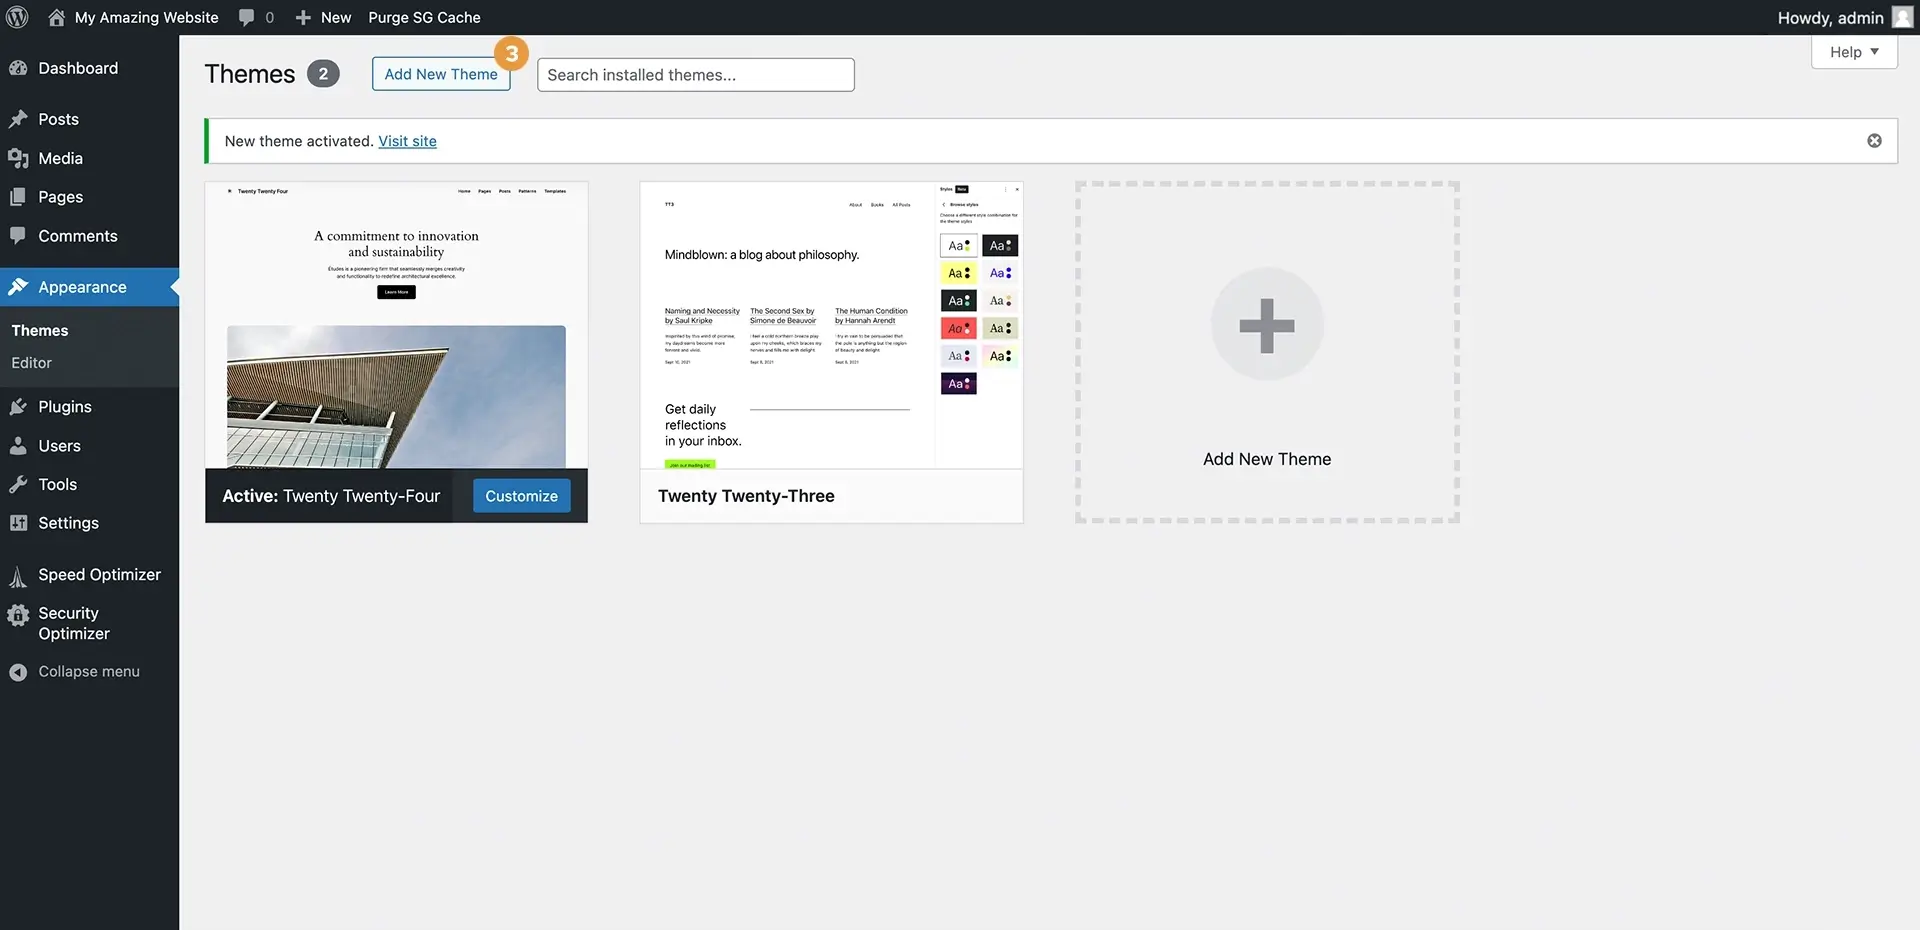
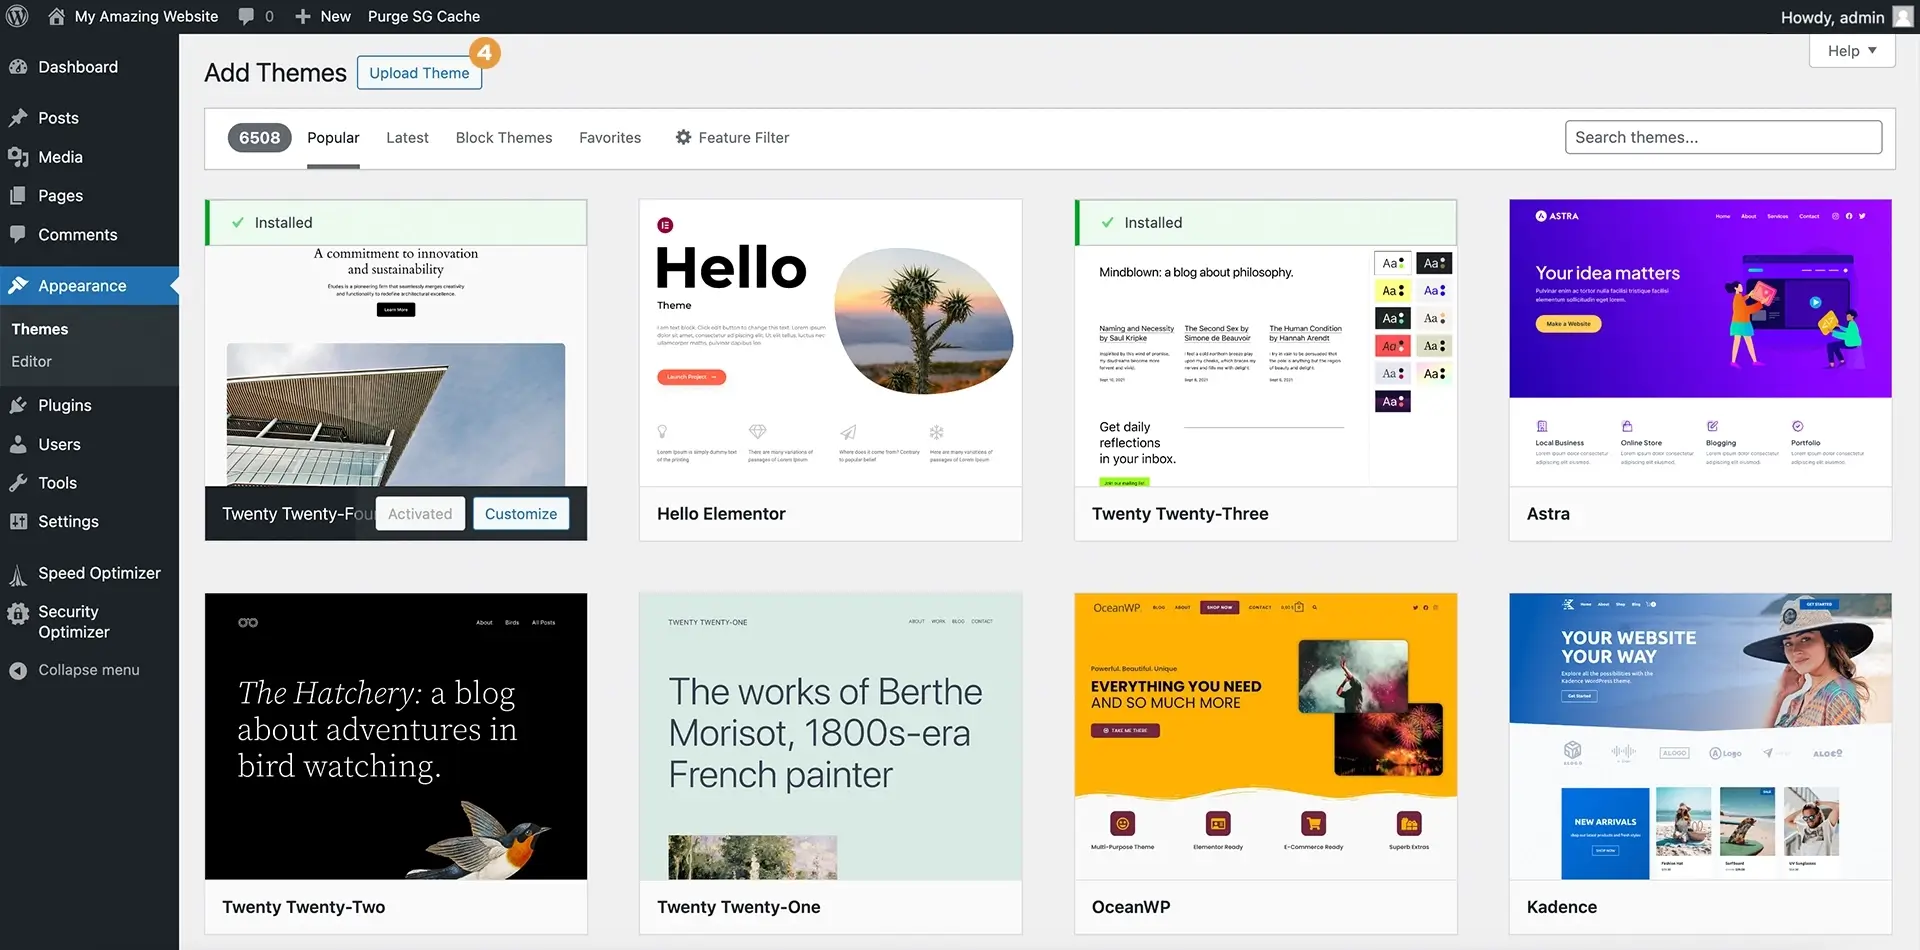
Click the Add New button at the top of the screen. This will load the existing theme library.
Click the Upload Theme button. This will show an upload form where we can select our theme zip file from our computer.
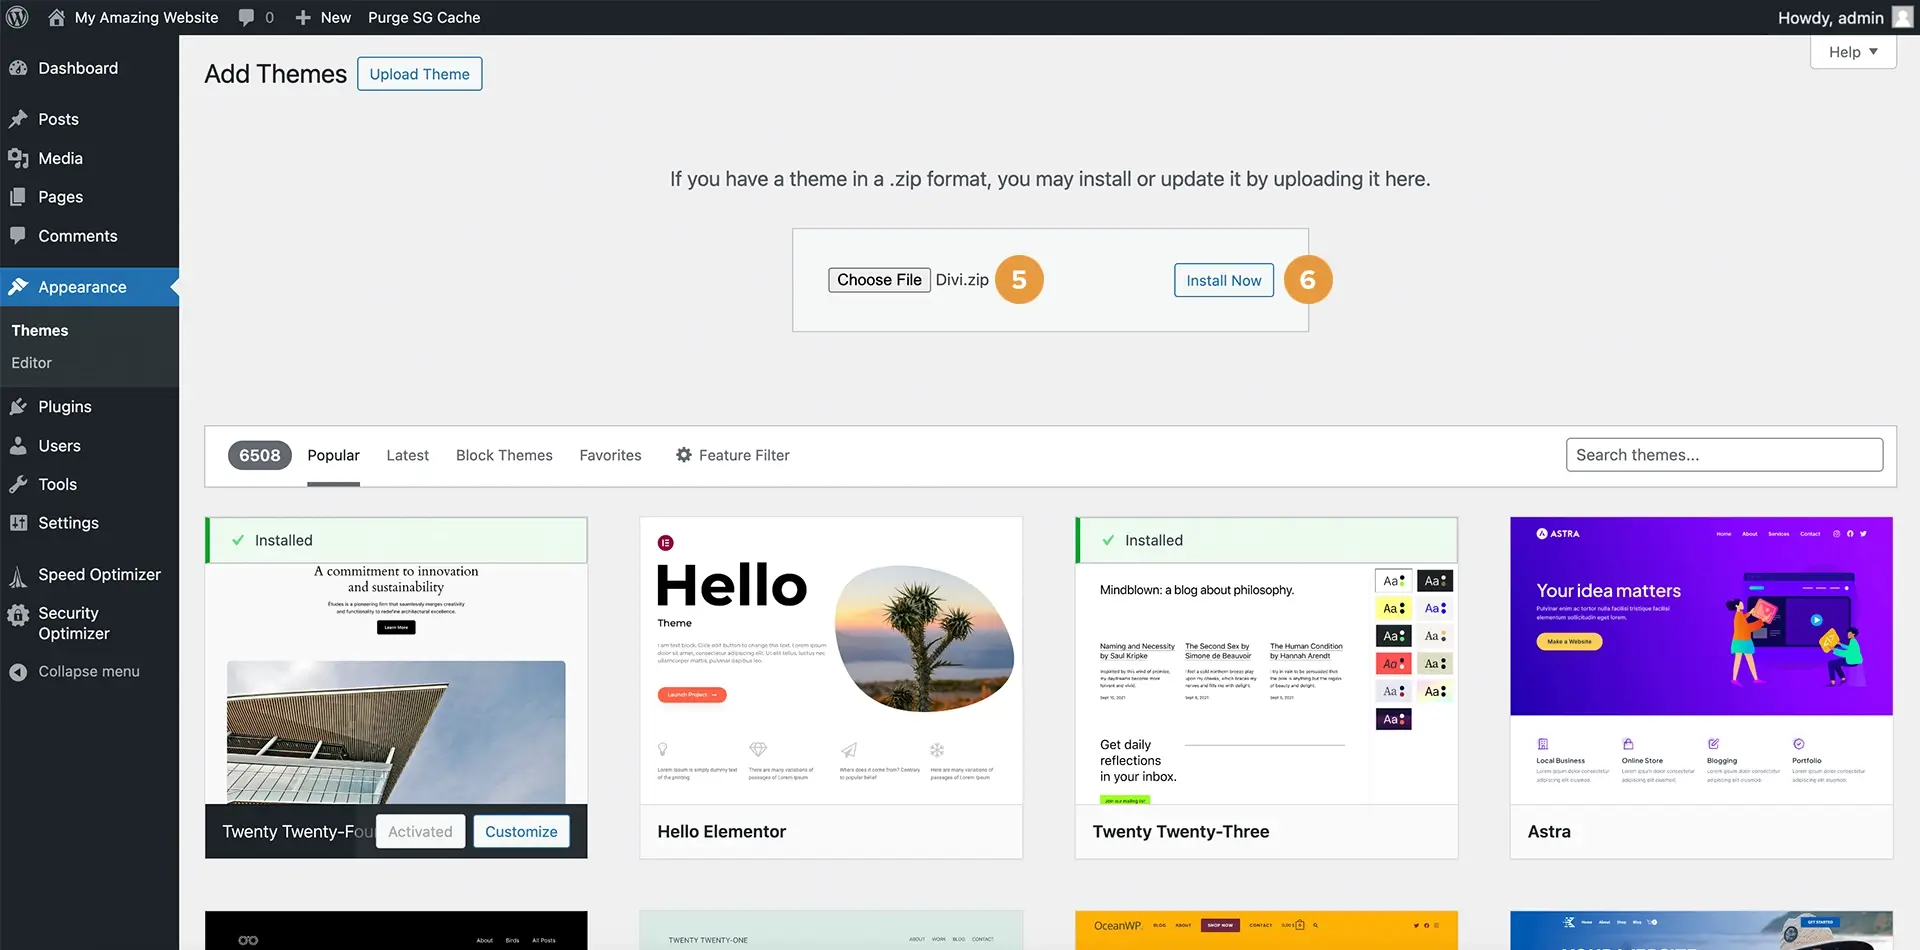
Drag and drop the Divi.zip file you downloaded from the Elegant Themes Members Area, or click the Choose File button and select the Divi.zip file on your computer. Once selected, click the Install Now button.
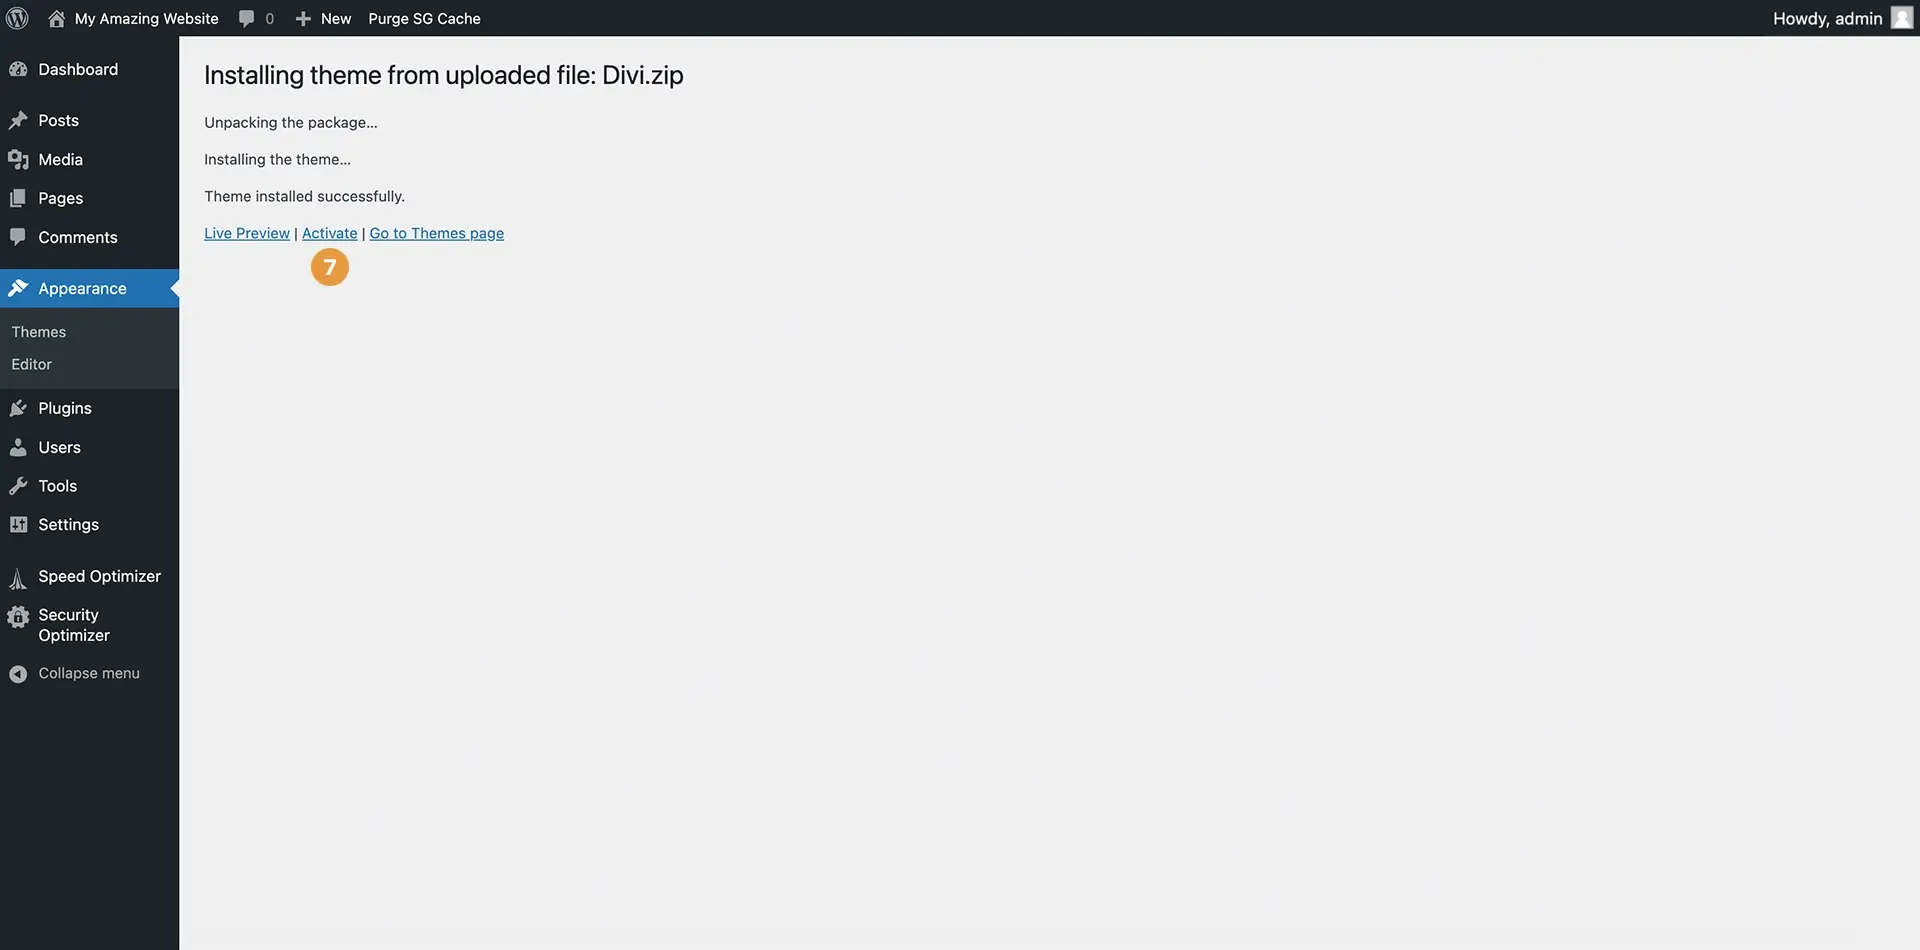
Once the Divi theme is installed, click the Activate button to activate the newly installed theme.
Step 4: Activate Your Divi License
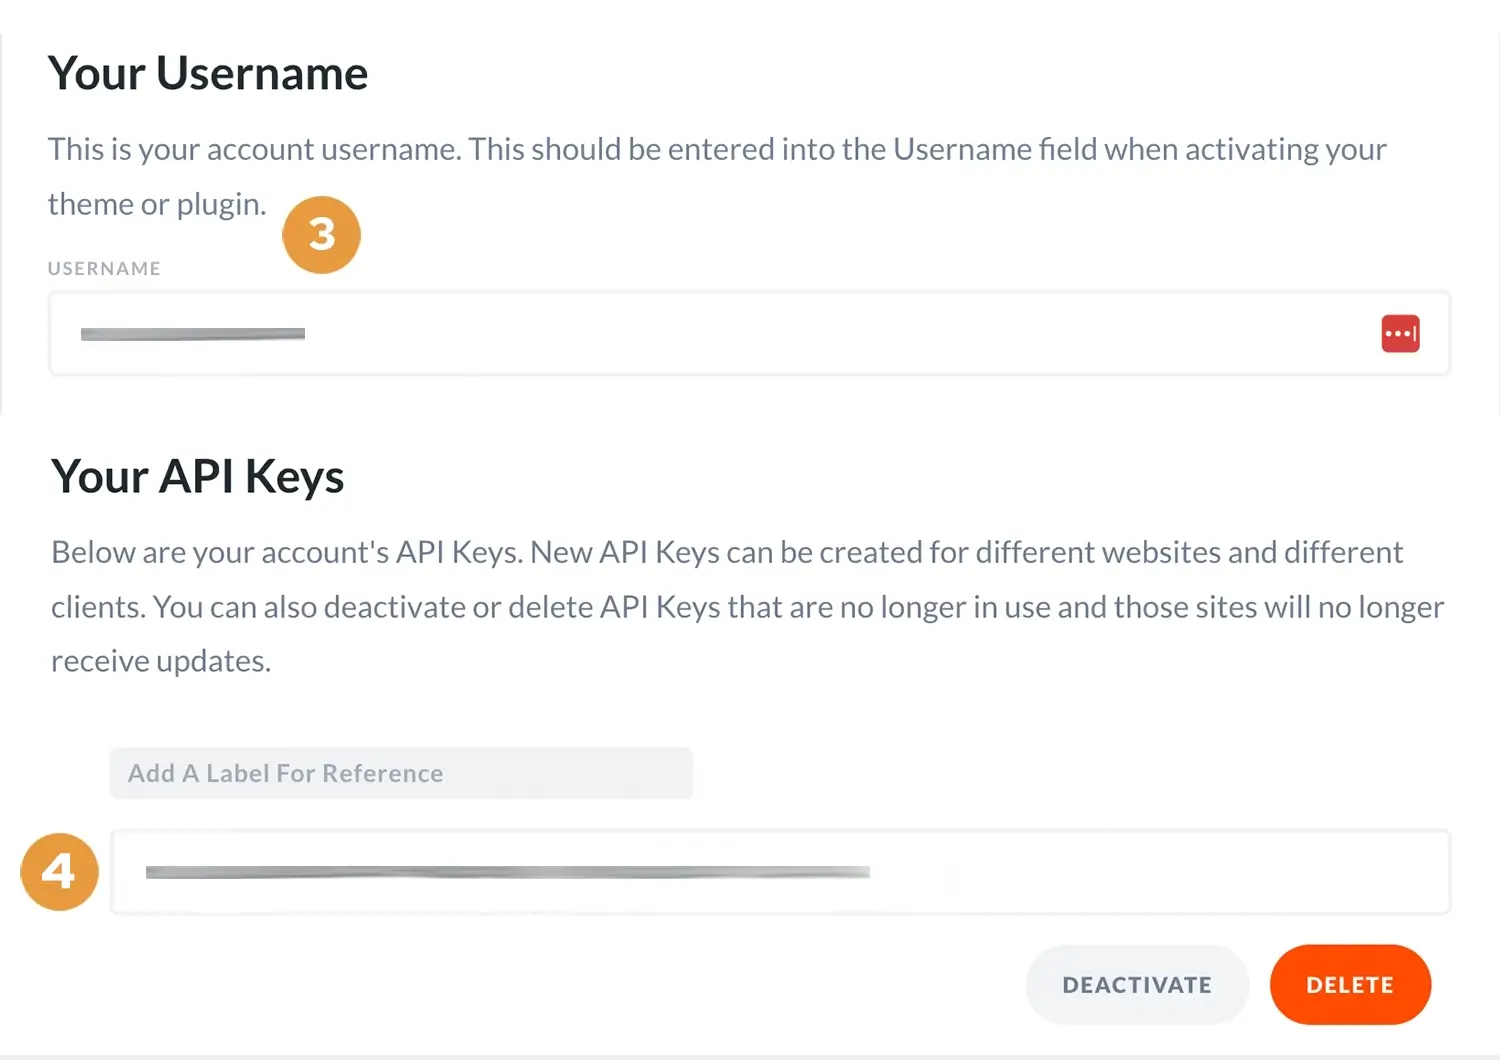
To get your Divi theme username and API key, go back to the Elegant Themes website and select the Username & API Key option from the Account drop-down menu.
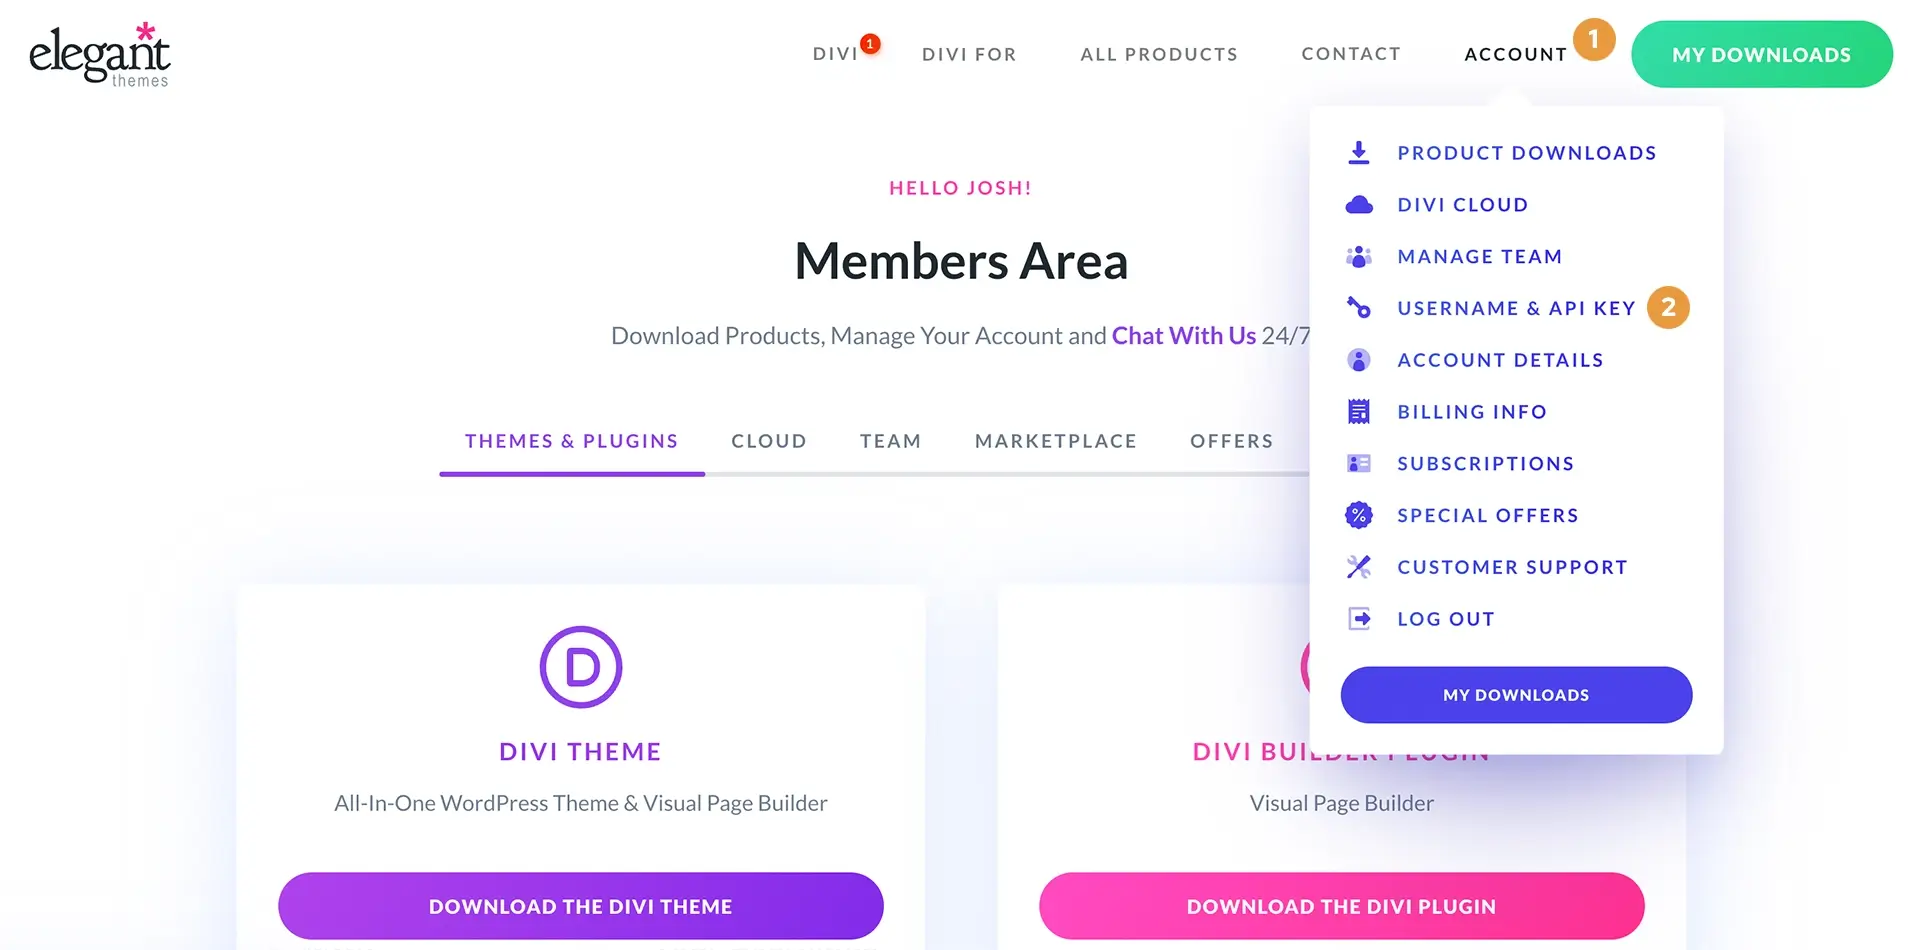
Grab the username and API key from the provided fields.
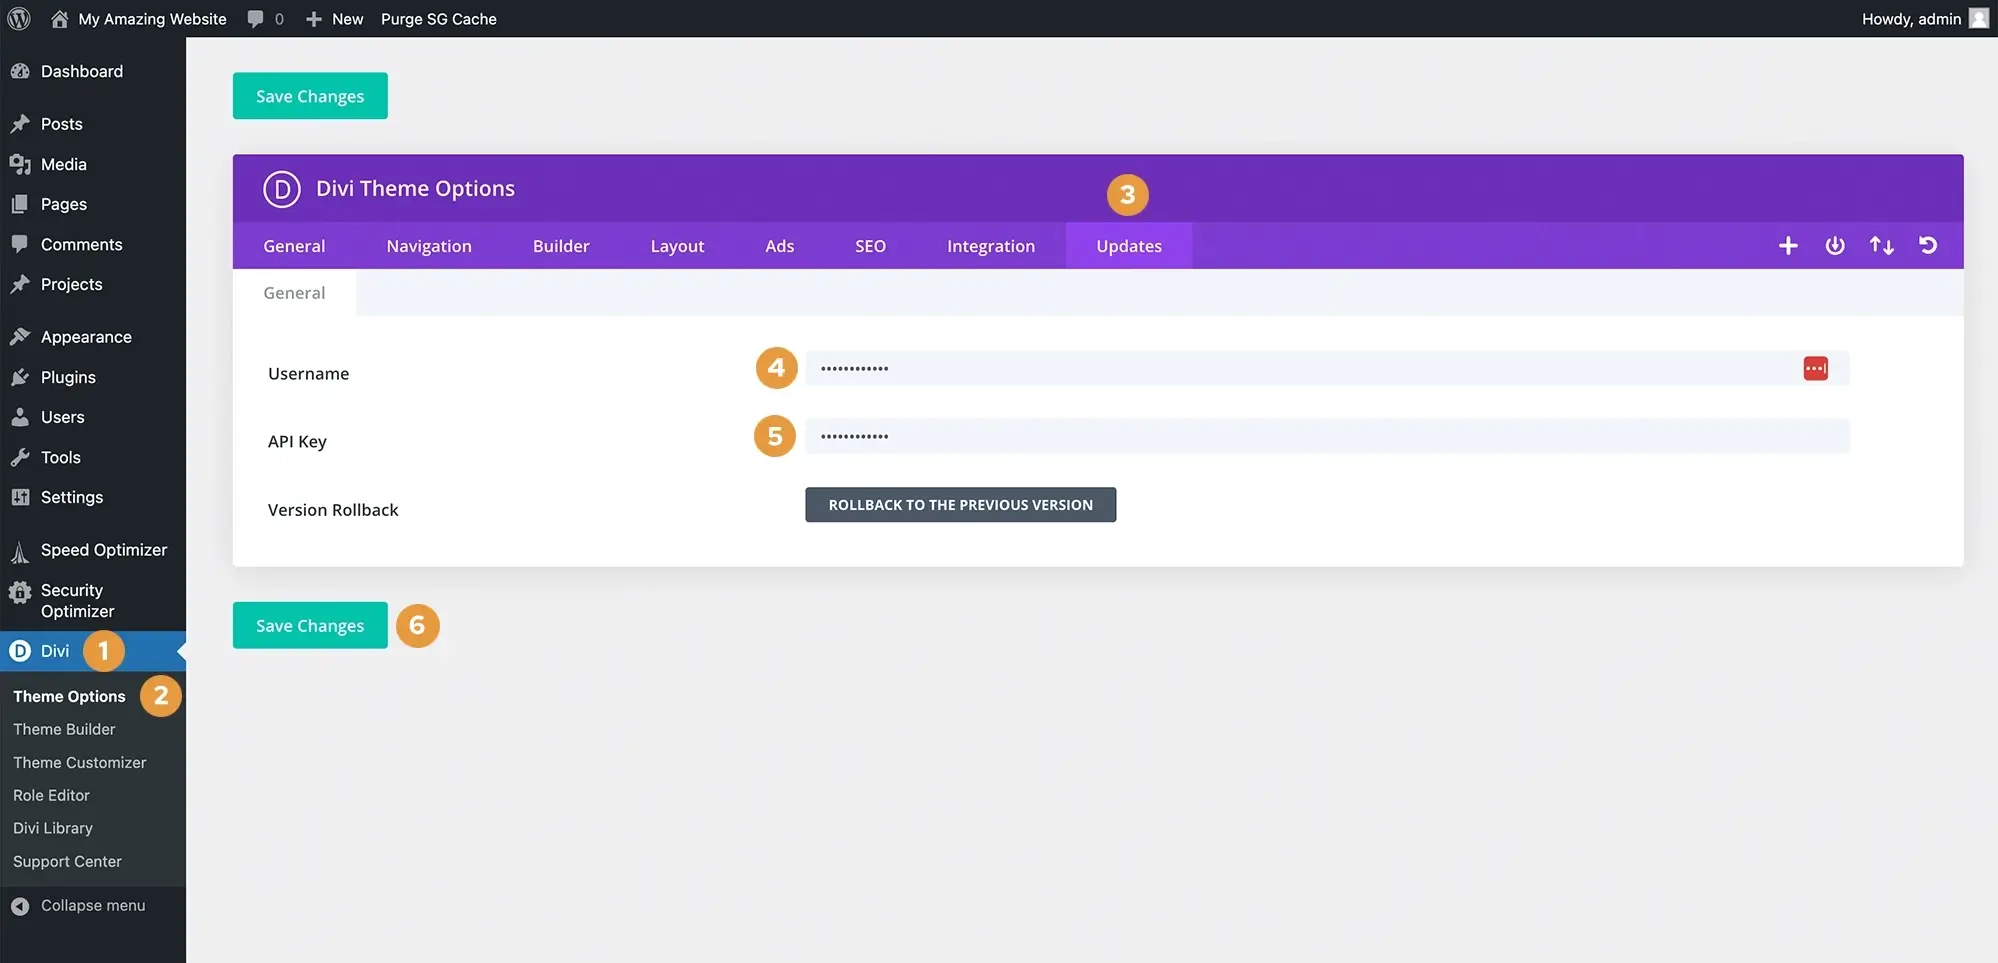
To activate your license in the WordPress dashboard, navigate to Divi > Theme Options, then click the Updates tab. You'll enter your username and API key, then click the Save Changes button to activate your license.
Now, the Divi theme is installed and ready to use!
Conclusion
Divi is a comprehensive website builder that makes web design accessible and enjoyable. With its intuitive drag-and-drop builder, extensive customization options, and wealth of features, Divi empowers you to create stunning websites without touching a single line of code.
So, whether you're building a personal blog, a portfolio, or a business website, Divi has the tools you need to bring your vision to life. Dive into Divi today and start creating something amazing!
Written by: Josh Rowe
Created: May 27, 2024
 WordPress