Setting Up a WordPress Hosting Account on SiteGround
 WordPress
 Whether you're a blogging newbie or a seasoned pro looking for a new hosting home, SiteGround is a fantastic choice. SiteGround is well-known for their user-friendly interface and hosting platform, top-notch security, and excellent customer support. Plus, finding a solution that works for you and getting started is super easy. Let's dive in and get your WordPress hosting account up and running on SiteGround!
Step 1: Visit SiteGround and Choose Your Plan
Head over to the SiteGround website. Click the Start Now button to see the different WordPress hosting options and select a plan.
Please note that this is an affiliate link for SiteGround WordPress hosting. I may receive compensation for purchases made through this link at no additional cost to you!
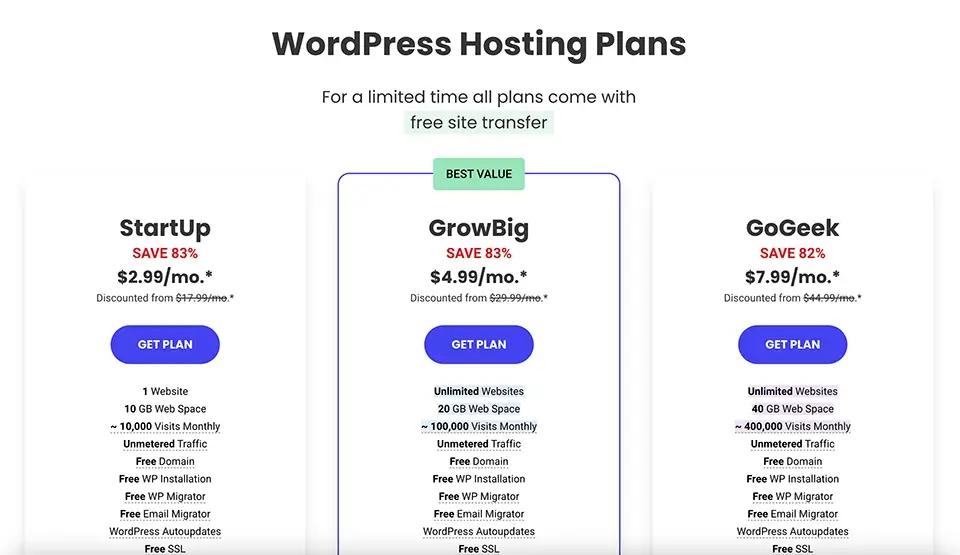
Choose the plan that best fits your needs. Don't worry — you can always upgrade later once your website becomes more popular and you need more space or resources.
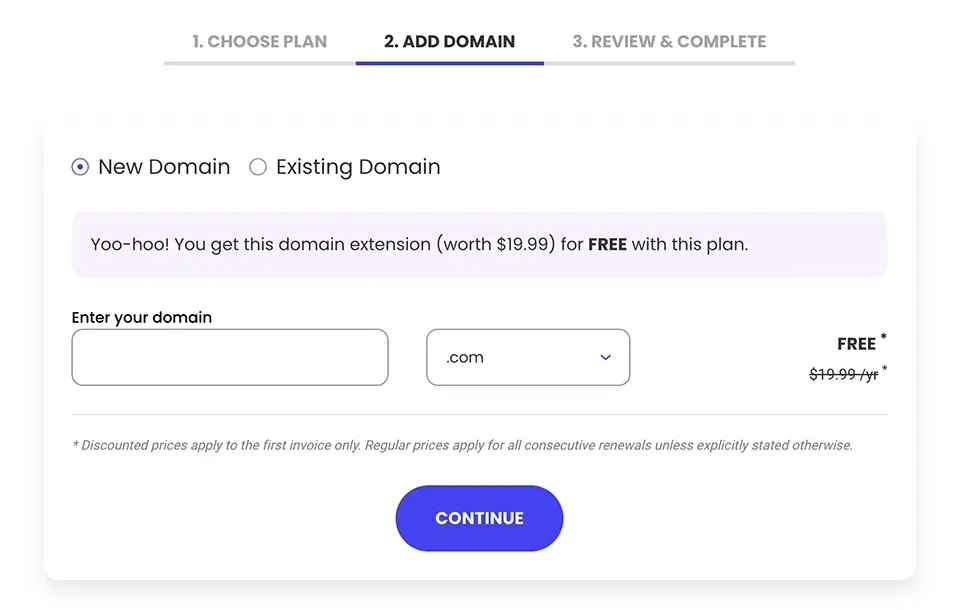
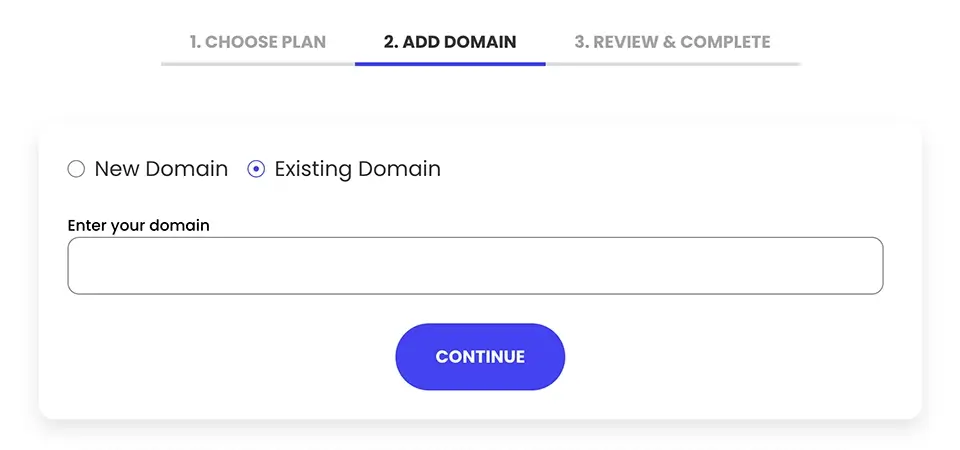
Step 2: Register or Transfer Your Domain
Next up, you'll need a domain name. If you don't already have one, SiteGround makes it super easy to register a new domain. Just type in your desired name and see if it's available.
If you already have a domain, you can transfer it to SiteGround. Select the I already have a Domain option and follow the prompts.
Keep your domain name short, memorable, and relevant to your content. And don't stress if your first choice isn't available — get creative!
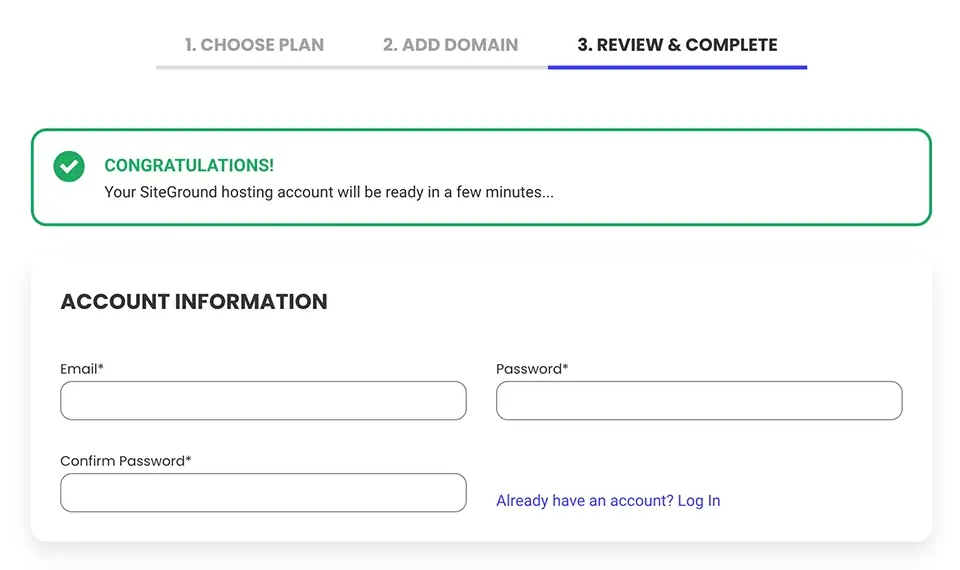
Step 3: Review and Complete Your Purchase
On this screen, you'll fill in your account information, including your email address, password, and some basic personal info. Then, you'll need to enter your payment details.
SiteGround often offers special discounts, so keep an eye out for those sweet deals. Also, pay attention to optional extra services like Domain Privacy and SG Site Scanner. They can add an extra layer of security to your site.
Step 4: Set Up Your WordPress Site
Install WordPress
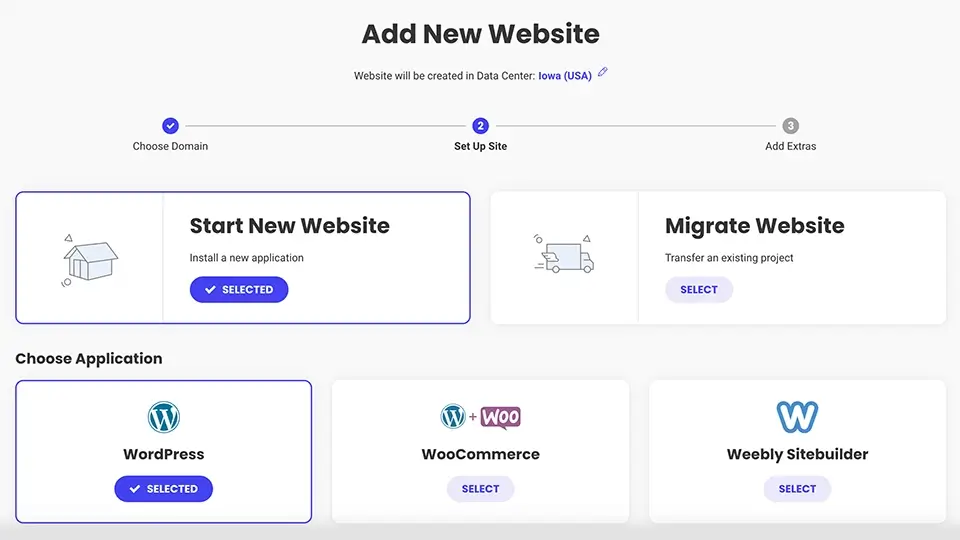
After your purchase is complete, you'll be directed to the SiteGround dashboard. From here, click the Websites tab in the top navigation bar, then click the New Website on the top-right corner of the screen.

You can choose whether to create a new domain or select an existing one. Since we've already set up our domain during the signup process, let's enter our existing domain name and continue.
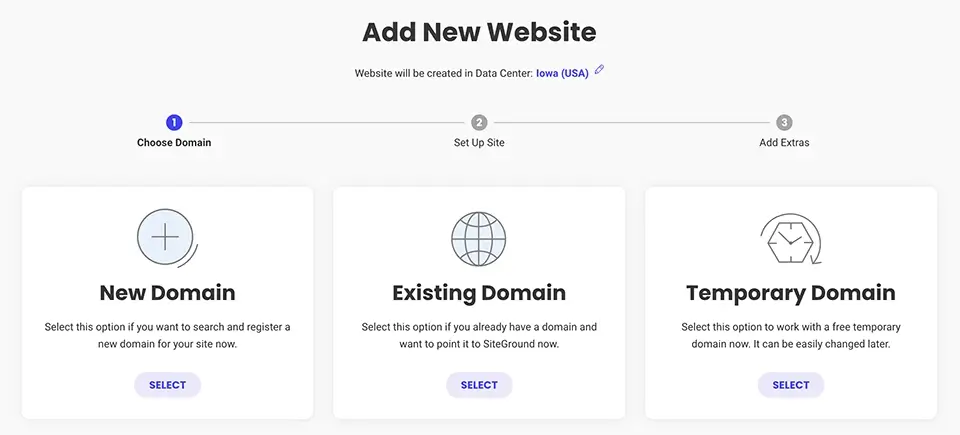
Now, select the Start New Website option and select WordPress as your platform.
And create login credentials you'd like to use for your WordPress administrator login. You can choose your own password or have SiteGround generate a strong password. Whatever option you choose, make sure to jot these down somewhere safe — you'll need them to log into your WordPress dashboard.

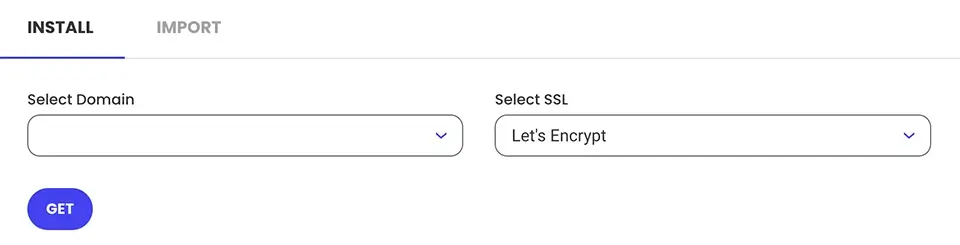
Install a Free SSL Certificate
Once your new website setup is completed, you'll want to install an SSL certificate. Let's Encrypt provides SSL certificates through SiteGround, which are completely free and automatically managed.
To install your SSL certificate for your SiteGround website, navigate to Security > SSL Manager, then select your domain if it's not already pre-selected and the type of SSL certificate you'd like to install. A standard Let's Encrypt SSL certificate should work for most cases.
Once the SSL certificate has been installed successfully, you'll be notified.
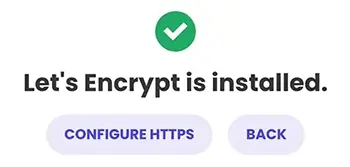
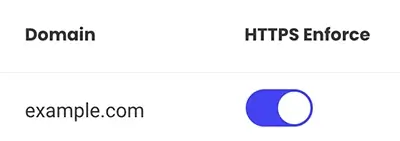
Now, navigate to Security HTTPS Enforce and enable the toggle switch. This ensures that every page request made on your website is secure.
Open the WordPress Dashboard
To access your WordPress dashboard, navigate to WordPress > Install & Manage in your SiteGround website's settings, then click the ![]() icon.
icon.
Step 5: Pick a Theme and Customize Your Site
WordPress has thousands of themes to choose from. In your WordPress dashboard (you can get there by going to example.com/wp-admin and logging in with your admin credentials), navigate to Appearance > Themes and start exploring. You can install a free theme or purchase a premium one. Once you’ve picked the perfect theme, hit Activate and watch your site transform.
I've done some deep dives into WordPress themes, but my all-time favorite is the Divi Theme Builder. Divi is a versatile WordPress theme and page builder that allows you to easily create visually stunning and highly customizable websites. Its intuitive drag-and-drop interface and extensive design options make it a popular choice for both beginners and experienced developers.
Customization is where the real fun begins. Tweak your site's appearance by going to Appearance > Customize. Play around with the settings, add your logo, change colors, and make your site yours!
Step 6: Install Essential Plugins
Plugins are like apps for your WordPress site — they add extra functionality and features. Here are a few must-have plugins to get you started:
- Security Optimizer: An out-of-the-box plugin by SiteGround that fortifies your site against threats with features like malware scanning, firewall protection, and automated backups.
- Speed Optimizer: Another plugin by SiteGround that boosts your site's loading times by leveraging caching, image compression, and code minification.
- Yoast SEO: Used to improve your site's search engine optimization. With this plugin, you can manage meta titles and descriptions down to the page level.
- Akismet: Used to protect your site from spam comments.
To install additional plugins, go to the Plugins > Add New option in your WordPress dashboard, search for the plugin name, and click Install Now. Once it's installed, remember to activate it!
Step 7: Create Content and Launch Your Site
Now, it's time to add some content. Navigate to Posts > Add New to create your first blog post. You can also create pages like About, Contact, and Portfolio by going to Pages > Add New.
Once you're happy with your content, it's time to launch your site and share it with the world. Don't forget to share your new site on social media, tell your friends, and maybe even celebrate with a little dance.
Step 8: Explore SiteGround Tools
SiteGround offers a bunch of handy tools to help you manage your site. From your SiteGround dashboard, you can access features like:
- Site Tools: Manage your files, databases, and email accounts.
- Security: Enable SSL, manage backups, and set up anti-spam measures.
- Performance: Optimize your site's speed with caching options and the SG Optimizer plugin.
Step 9: Get Support When You Need It
Running into a snag? No worries! SiteGround's customer support is top-notch. They offer 24/7 live chat, phone support, and a ticketing system. Plus, their knowledge base is packed with helpful articles and tutorials.
Conclusion
Congratulations! You've successfully set up your WordPress hosting account on SiteGround, paving the way for your online presence to shine. From choosing the perfect plan to customizing your site with themes and essential plugins, you've tackled each step like a pro. With SiteGround's user-friendly interface and stellar support, you've built a solid foundation for your website, and you're ready to share your content with the world.
Now, it's time to let your creativity and passion take center stage. Your new WordPress site is just the beginning — embrace the adventure ahead and make your mark on the digital world!
Written by: Josh Rowe
Last Updated: May 27, 2024Created: May 26, 2024